Friday 27 September 2013

Cherry Cupcakes

Hello!

It's Friday so it's time to mash! This week Erica has a fun colour challenge with a theme...


Here's your Mashup Challenge:
  1. Create a project with using the colors "Cherry Cobbler, So Saffron & Early Espresso."
  2. Create a project using a "Fruit Image."
  3. Or Mash it Up and create a project using the above "Color Combo & a Fruit Image. "

I could only think of ONE stamp set in my collection that had any form of fruit in it so I pulled out Create-a-Cupcake and made some cherry-topped cupcakes...


This card has a lot of stuff going on - still not convinced about the striped paper but it kinda reminds me of a fun candy/ice cream store or something... Oh well, I'm sure someone will like it for their birthday lol!

Two of the papers (the Cherry Cobbler patterns) are from the Season of Style dsp (shows that Stampin' Up's designer paper is so versatile it doesn't just have to be for Christmas!), and I added some Daffodil dsp from Quatrefancy. The cupcakes were stamped onto Whisper White and cut out by hand (still haven't got that punch... keeps getting pushed down my list for other new stuff!), the icing was embossed with the Beautifully Baroque embossing folder for added texture, and the cherries were 'glazed' with Crystal Effects. They cupcakes were layered on a punched scallop circle, which I pierced in each scallop for added interest. The scalloped border was created using one of the Adorning Accents edgelits and the coordinating embossing folder. I sponged around the striped dsp with Cherry Cobbler ink to soften it a little, and layered the sentiment from Itty Bitty Banners over the top.

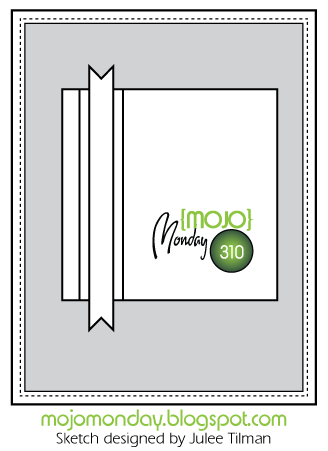
I used the sketch from the Paper Players this week...


Here's the recipe:
Stamps: Create a Cupcake, Itty Bitty Banners
Ink: Cherry Cobbler, Early Espresso, Daffodil Delight
Paper: Season of Style dsp, Quatrefancy dsp, Early Espresso, Daffodil Delight, Whisper White
Accessories: Crystal Effects, silver mini brads
Tools: Itty Bitty Banner framelits, Beautifully baroque EF, Adorning Accents edgelits & embossing folder, 1 3/4" scallop circle punch, piercing tool

Make sure you check out the rest of the DT's 'fruity' creations over at the Friday Mashup this week!

Thanks for stopping by...

x Amy x

Tuesday 24 September 2013

Amazing Chalkboard

Hiya!

I'm a bit later than usual posting my ColourQ card this week - I'm doing overtime at work so I've not been home today like usual. This week's challenge is a really fab one with lots of room for you to add your own spin!


I chose to use Cherry Cobbler as I wanted to use the gorgeous new ribbon in the Autumn/Winter catty and I thought it would make a striking splash of colour...


When I thought of black and white I thought of creating a 'chalkboard' effect with the You're Amazing set. I stamped it with Versamark on Basic Black and embossed with white EP, then sponged on a bit of white craft ink for the 'chalk dust'. The whisper white strip underneath was stamped with the Music notes wheel, then the whole panel was layered on some Silver Glimmer paper, then onto a piece of Basic Black card, embossed with the Beautifully Baroque embossing folder. That bow did NOT happen easily {by the way!} - I faffed about with it for ages before I was happy with how it looked (just in case you think I have magic fingers that miraculously produce perfect bows each time lol!!).

I used this week's Retro Sketch for my layout...


Here's the recipe:
Stamps: You're Amazing, Music notes wheel
Ink: Versamark, Stazon black
Paper: Basic Black, Whisper White, Silver Glimmer
Accessories: white embossing powder, Cherry Cobbler stitched edge grosgrain ribbon
Tools: Beautifully Baroque embossing folder

Make sure you check out the FAB creations from the Royal Court this week!

Thanks for stopping by...

x Amy x

Friday 20 September 2013

Paper Pieced Poinsettia

Hello!

This week's challenge at the Friday Mashup had me scratching my head for a while!


Here's your Mashup Challenge:
  1. Create a project with a "Fall/Harvest Food Theme (Preserves, Apples, Pumpkins etc.)."
  2. Create a project using "Paper Piecing."
  3. Or Mash it Up and create a "Fall Food themed project with some Paper Piecing "

Now I don't have any stamps to do with harvest and certainly nothing that would work for paper piecing (believe me, I scoured the catalogue to see if there were any I could use!), so I decided to use the technique part of the challenge with a Christmas theme (I have a Christmas class tonight so I was in Christmas-card mode this week!)...


This lovely poinsettia stamp is from the Joyful Christmas stamp set in the Autumn/Winter catalogue, and it has so many possibilities. I stamped it once on Cherry Cobbler card, then again on some Season of Style dsp. I cut out the outer and inner flowers then layered together with dimensionals, adding pearls in the centre. The leaves were stamped on Old Olive card that I had stamped lightly with the En Francais (this was actually a piece of scrap card I had lying around and decided to use up). The background is more dsp from Season of Style, layered onto Cherry Cobbler card cut with the scalloped square framelit.

Here's the recipe:
Stamps: Joyful Christmas, More Merry Messages
Ink: Chocolate Chip, Old Olive
Paper: Season of Style dsp, Cherry Cobbler textured card, Old Olive
Accessories: Pearls
Tools: Squares framelits

Make sure you check out the fall-themed creations from the rest of the DT this week!

Thanks for stopping by!

x Amy x

Tuesday 17 September 2013

Amazing You

Hello!

It's time to share another ColourQ creation, and this week we've got a palette featuring some of the new Stampin' Up In Colours...


As soon as I saw this week's CAS(E) this Sketch, I knew what I wanted to do and this came together pretty quickly...


I used Strawberry Slush and Baked Brown Sugar markers to ink up the flowers and leaves (from Hopeful Thoughts), then added some shading with the BBS marker onto the stamped image. I also added some Dazzling Details to the centre of each flower (which you can't really see in the pic!). The butterflies were die-cut from Calypso Coral card. The card base was made with the Bigz Oval Accent die and Night of Navy cardstock, and I layered a shape cut from Strawberry Slush cardstock with one of the Apothecary Accents dies, then added a couple of candy dots to finish.

Here's the sketch that inspired me...


Here's the recipe:
Stamps: Hopeful Thoughts, Express Yourself
Ink: Night of Navy, Baked Brown Sugar & Strawberry Slush marker
Paper: Whisper White, Strawberry Slush, Night of Navy, Calypso Coral
Accessories: Dazzling Details, Regals candy dots
Tools: Beautiful Wings embosslits die, Oval Accent bigz die, Apothecary Accents framelits, Labels framelits, Itty Bitty banners dies

Make sure you check out the creations from the amazing Royal Court this week!

Thanks for stopping by...

x Amy x

Monday 16 September 2013

Framed Clay Bauble

Hiya!

Would you like to see another sample using Simply Pressed clay? I've got another one to share today, this time combining the sketch from IN{K}PIRE_me as well as the Just Add Ink challenge to add frames...


With this one, I rolled out some clay, pressed the Northern Flurry embossing folder into it then left it to dry, then die-cut it with one of the ornament framelits...


After I cut the ornament shape I sponged over the top with Pool Party ink and left to dry. I created the frame with Smoky Slate cardstock and used the Squares framelits to die-cut it, then embossed it with the Square Lattice EF. The white card underneath was embossed with the Mosaic embossing folder, then the frame was layered over the top with dimensionals. The dsp is from the lovely Winter Frost collection in the Autumn/Winter catty. I stamped a greeting from More Merry Messages on the lower triangle with Smoky Slate ink, then added some rhinestones and Pool Party seam binding ribbon to finish.

Here's the recipe:
Stamps: More Merry Messages
Ink: Pool Party, Smoky Slate
Paper: Winter Frost dsp, Smoky Slate, Whisper White
Accessories: rhinestones, Pool Party seam binding ribbon
Tools: Square framelits, ornament framelits, Square lattice EF, Mosaic EF, Northern Flurry EF

Thanks for stopping by!

x Amy x

Sunday 15 September 2013

Elegant Clay Butterfly

Hi there!

I'm popping in for another quick post - this time with a little something I made with the Freshly Made Sketch this week...


I did a little training session on Saturday on using Stampin Up's Simply Pressed clay and one of the ways was stamping an image into rolled clay, then once dry, die-cutting it. This is the card I made to showcase the embellishment created with this technique...


Here's the recipe:
Stamps: Backyard Basics, Happy Day, Blooming with Kindness
Ink: Bermuda Bay, Coastal Cabana, Crushed Curry
Paper: Eastern Elegance, Coastal Cabana, Whisper White
Accessories: rhinestones, Simply Pressed clay, Coastal Cabana ruffled ribbon
Tools: Backyard Basics framelits, corner rounder punch

Thanks for stopping by!

x Amy x

Saturday 14 September 2013

Clay Fusion Flowers

Hello!

I'm just popping in quickly to post a card I made in a creative evening last night, using the Fusion Challenge with the colours from Pals Paper Arts...


I was inspired by the sketch as well as the script with the overlaying image, and I wanted to use some clay flowers I had made for a technique demonstration at a SU training day, so I came up with this...


Here's the recipe:
Stamps: Oh Hello, Flowering Flourishes
Ink: Calypso Coral, Baked Brown Sugar
Paper: Modern Medley dsp, Calypso Coral, Baked Brown Sugar, Very Vanilla, Naturals Ivory, Vellum cardstock, creped filter paper
Accessories: lace trim, vintage faceted buttons, simply pressed clay, pearls
Tools: Ovals framelits, Floral framelits, sizzlits delicate doilies die, Blossom Party die, Finishing Touches edgelits

I'm keeping it short and sweet tonight cos I need some sleep!!

Thanks for stopping by...

x Amy x

Friday 13 September 2013

Sympathy Butterflies

Hello there!

This week at the Friday Mashup Heidi is our hostess and she is making us aware of a very important cause and support group...

October is National Pregnancy and Infant Loss Awareness Month.  Each year, approximately 870,000 families experience the loss of a baby during pregnancy or shortly after birth.  We have a support group through our local hospital called H.A.N.D.S., Hope after Neonatal Death through Sharing, which holds a Walk to Remember and balloon release event every October to commemorate our babies.

In addition, the support group provides assistance and emotional support to the families undergoing the loss of an infant, including ceramic memory boxes, crocheted blankets and infant gowns, and help with funeral arrangements.  I cannot donate these type of items, as I have no talent for these crafts, but I can donate cards.  The support group sends out cards to members during their time of grief as well as on the anniversary of their loss. 


Here's your Mashup Challenge:
  1. Create a "Thinking of you or condolence card."
  2. Create a card/cards and "Donate it to a Charity or Organization of your choice."
  3. Or Mash it Up and create a "Thinking of you/Condolence Card and donate it to H.A.N.D.S via Heidi."
I kept my card fairly simple, using the butterflies from Backyard Basics and some dsp...


The butterflies were stamped on Whisper White with Stazon and coloured with a blender pen and Rich Razzleberry ink and marker, as well as a touch of Smoky Slate on the bodies. They are layered on Naturals White, with the sentiment (from Loving Thoughts) layered over a couple of punched ribbon strips. The dsp is from the This & That Epic Day collection and both the focal panel and dsp were layered on Basic Black. I added some silver mini brads in the corners.

I used the sketch from Mojo Monday and colours from the Paper Players for this one...


Here's the recipe:
Stamps: Backyard Basics, Loving Thoughts
Ink: Rich Razzleberry, Stazon black
Paper: This & That Epic Day dsp, Rich Razzleberry, Naturals White, Whisper White, Basic Black
Accessories: Silver mini brads
Tools: Backyard Basics framelits, Dotted scallop ribbon border punch

Make sure you see all the wonderful creations from the rest of the design team this week!

Thanks for stopping by...

x Amy x

Tuesday 10 September 2013

Sparkly Birthday Gifts

Hiya,

This week at the ColourQ we have a fabulous bright colour challenge for you...


Initially I struggled to come up with an idea for this one and kept looking at different stamp sets and changing my mind... Then I took out cardstock and dsp of each colour, put them together and immediately thought 'bright, fun, birthday' and thought of the new Christmas set called 'Wishing You' (from the Autumn/Winter catty) and thought the stack of gifts would work for a birthday card too, so that's where I started...


I wanted panel to have a pattern of some sort and I started with the Daffodil Delight dsp from Quatrefancy, so I decided to add the mosaic theme to the other panels, with embossing on the Bermuda Bay strip (and highlighting with white ink) and layering some Quatrefancy printed window sheet over Primrose Petals card. Normally I like using darker cardstock to layer each panel onto, but because these colours are so bright I used white instead, and used Rich Razzleberry as my card base.

The presents were stamped four times, once in each colour, then cut out and layered together to make the multi-coloured stack. I added some Dazzling Details clear sparkle to some of the presents, as well as to a couple of Bermuda Bay candy dots (just when I thought candy dots couldn't get any better... I discovered sparkly candy dots! {grin}). The sentiment is from Create a Cupcake, stamped with Rich Razzleberry. I added some faux stitching with a Rich Razzleberry marker to the main panel as well. The final touch was adding the white organza ribbon.

I used this week's Deconstructed Sketch for this one..


Here's the recipe:
Stamps: Wishing You, Create a Cupcake
Ink: Bermuda Bay, Primrose Petals, Rich Razzleberry, Daffodil Delight, Rich Razzleberry marker
Paper: Quatrefancy dsp, Bermuda Bay, Primrose Petals, Rich Razzleberry, Whisper White
Accessories: Brights candy dots, white organza ribbon, Dazzling Details
Tools: corner rounder punch

Make sure you check out the fab creations from the rest of the design team this week!

Thanks for stopping by...

x Amy x

Friday 6 September 2013

Little Washi Ornaments

Hiya!

It's time for another Friday Mashup challenge, and this week Holly's got a great one...


Here's your Mashup Challenge:
  1. Create a project with "Washi Tape."
  2. Create a "set of 3x3 Quick Note Cards."
  3. Or Mash it Up and create a "Set of 3x3 Note Cards using some Washi Tape".
Now I have to admit, I'm a new fan of washi tape, but I'm NOT a fan of 3x3" cards (they just seem a bit useless to me!) - but I thought I would tackle the challenge head on and create a set of little cards that could perhaps be Christmas gift cards or something... We have some great new washi tape available in our seasonal catalogue which was perfect for this project so I decided to make some washi tape ornaments...


And I was quite pleased with how they turned out! I created the ornaments by sticking strips of washi tape to a piece of large strip of Whisper White card, then placed the ornament framelits over the top and ran through my Big Shot to create a bunch of washi ornaments - easy peasy and very quick! I had to add some sparkle so I took out a scrap of Champagne Glimmer paper and die-cut just the tops of the ornaments then glued them over the washi ones. The sentiments are from Teeny Tiny Wishes (cut with the Itty Bitty Banners framelit) and Petite Pairs.

To create the layer behind the ornaments, I cut some Whisper White card with one of the squares framelits, then replaced my cutting mat with the Big Shot crease mat, placed the next smallest framelit over the Whisper White square (cutting edge down) and ran through the Big Shot again... voila! Lovely debossed frame! I made the 3x3" cards out of Cherry Cobbler textured card (also available in the seasonal catty) and added some faux stitching to a couple using the new chalk marker (lots of fun and very easy to use!).

I even made a little box for these...


I'm thinking they will make a cute hostess gift!!

Here's the recipe:
Stamps: Teeny Tiny Wishes, Petite Pairs
Ink: Old Olive
Paper: Cherry Cobbler textured card, Old Olive, Whisper White, Champagne Glimmer
Accessories: Season of Style washi tape, white chalk marker
Tools: Squares framelits, Ornament framelits, Itty Bitty Banner framelits

Make sure you check out the rest of the wonderful washi creations from the design team this week!

Thanks for stopping by...

x Amy x

Wednesday 4 September 2013

Dynamic Merry Sparkle

Hiya!

I needed to prepare a swap for my team training yesterday so I used this week's Dynamic Duos colour challenge to help me...

I flicked through my Colour Coach and found a combo with Blushing Bride and Sahara Sand (which is ok cos SS is a neutral!) so I went with that and made a non-traditional Christmas card...


I used some new goodies from the Autumn/Winter catty (did you spot the 'shop now' button on my blog sidebar?? Yes the UK now has online shopping from SU - woohoo!! More to come on that tomorrow...). The presents from Wishing You were stamped on Whisper White with Blushing Bride and then again with Versamark to one side. I added Heat & Stick powder to the Versamark image and heated, then added some silver glitter (available in the Autumn/Winter catty) and heated to set (very sparkly IRL). I cut the focal point out with an oval framelit, then debossed the next smallest framelit inside (using a crease mat instead of a cutting mat in the Big Shot). I layered the oval onto a piece of Silver glimmer paper cut with a Labels framelit.

The Sahara Sand strip in the middle was stamped with the text from O Holy Night with Sahara Sand ink and layered onto a piece of Perfect Plum, cut either side with the Finishing Touches edgelit die. The Blushing Bridge piece was embossed with the Mosaic embossing folder (kinda reminds me of Christmas baubles!) then layered on Perfect Plum and onto a white A6 card base. The final touch was to cut the 'merry' from Perfect Plum card using the new Expressions Thinlets die. I smooshed the Perfect Plum inkpad over the top of the 'merry' in order to make it darker and really pop over the top of the presents.

Hope you've enjoyed looking at my sparkly Christmas card! Thanks for stopping by...

x Amy x

Tuesday 3 September 2013

Grunge Love Hearts

Hello!

This week over at the ColourQ we have a fabulous colour scheme for you...


I borrowed 'Gorgeous Grunge' from my friend and team member who lives around the corner from me (very handy for both of us lol!) and played around with that as well as one of the new Expressions Thinlets dies...


The Whisper White panel was stamped with one of the splatters from Gorgeous Grunge with grey, then I layered a punched heart (from Quatrefancy dsp) and a stamped and die-cut heart (from Hearts a Flutter) over the top. I glued this panel onto some Basic Grey core'dinations card and embossed on both sides with one of the Needlepoint embossing folders then lightly sanded to reveal the core. This was layered onto Silver glimmer paper then onto some more Quatrefancy dsp and finally a layer of Raspberry Ripple cardstock. The 'love' was die-cut from Raspberry Ripple card and adhered with Tombow glue. I finished things off with a few basics rhinestones.

I used the fab Sketchbook Saturday layout (slightly altered) from Chupa to help me on this one...


Here's the recipe:
Stamps: Gorgeous Grunge, Hearts a Flutter
Ink: Smoky Slate, Island Indigo
Paper: Quatrefancy dsp, Silver Glimmer, Basic grey core'dinations, Whisper White, Raspberry Ripple
Accessories: Basics rhinestones
Tools: Full Heart punch, Hearts a Flutter framelits, Needlepoint embossing folder, sanding block, Expressions Thinlets die
 
Make sure you check out the wonderful creations from the rest of the design team this week!

Thanks for stopping by...

x Amy x


Monday 2 September 2013

Grateful Apothecary Tablescape

Hiya!

I've been playing with one of the new kits from the Autumn/Winter catty called Thankful Tablescape - it's designed for creating table settings and decorations but there are SO many more possibilities! In fact, I'm holding a class this coming weekend on it (more to follow about an online version..!) and I had so much fun designing the projects. When I saw the colours from this week's Create with Connie & Mary challenge I knew it would be a perfect opportunity to use some of the kit...


It just so happens that these are the colours included in the kit (as well as the neutral Sahara Sand). I took out my Apothecary Art stamp set (one of the most fabulous sets for colouring in the catalogue!!) and came up with this...


Here's the recipe:
Stamps: Apothecary Art, Loving Thoughts
Paper: Thankful Tablescape kit, Chocolate Chip, Whisper White, Naturals White
Ink: Stazon, Chocolate Chip, Tangerine Tango, Crushed Curry
Accessories: Crushed Curry chevron ribbon, basics pearls
Tools: Labels framelits

That's all for now... Thanks for stopping by!

x Amy x