Friday 29 June 2012

Creative Owl...

Hi there,

Happy Friday to you! (or happy exam day to me lol!). It's time for the Friday Mashup challenge and this wek we're having fun with punches...

So here is the "Mashup" Challenge :
  1. Make a project with " Punch Art ".
  2. Or Make a project featuring your " Favorite Animal ".
  3. Or "Mash it Up" and create a project " with an Animal made from Punches ".

I decided to make a piece of wall art for my sister, who loves owls and loves yellow...


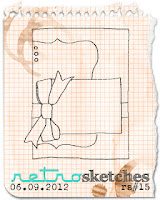
I kinda went the easy route for punch art and used a punch that makes things VERY easy - the Owl builder punch. As well as loving owls, my sister is an apprentice on Savile Row in London and is a very talented tailor/cutter, so I thought the owl needed to have a special waistcoat so I added some mini brads for buttons. I added the word Create to inspire her as she works or draws (she's an amazing artist). This type of wall art is so easy to make using a piece of chipboard - slightly smaller than 6" square. You just cover it with dsp, sand lightly around the edges, punch some holes in the top using a crop-a-dile then treat it like a card base. I used Crumb Cake seam binding ribbon to hang it with. The layout comes from Mojo Monday this week.

Here's the recipe:
Stamps: Creative Elements
Ink: Charcoal
Paper: Domestic Goddess dsp, Basic Grey, Crumb Cake, Whisper White, Chipboard
Tools: Owl builder punch, circles #2 die, scallop square die
Accessories: Daffodil Delight stripped ribbon, Crumb Cake seam binding, silver mini brads, grey marker

I look forward to seeing what people create using their punches this week! Thanks for stopping by...

x Amy x


Thursday 28 June 2012

Paisley Butterfly...

Hiya,

It's been a busy week this week with big events at work and essays and an exam to do at Bible School so I haven't had a lot of time for getting inky, but I did manage to play along with the Paper Players sketch this week...


I used some more of the Paisley Petals dsp and went a bit OTT on this one lol!


I created a rosette using my Simply Scored tool and layered a die-cut from Perfect Pennants with Bravo Burgundy card. The butterfly was stamped with stazon and coloured with markers.

Here's the recipe:
Stamps: All a Flutter, Happiest Birthday Wishes
Ink: stazon, Bravo Burgundy
Paper: Paisley Petals dsp, Bravo Burgundy, Baja Breeze, Whisper White
Tools: Circles #2 die, Perfect Pennants die, eyelet border punch
Accessories: Old Olive satin ribbon

Thanks for stopping by!

x Amy x

Sunday 24 June 2012

It's your day...

Hiya,

I recently got the Paisley Prints dsp (and wondered why I hadn't got it sooner!) and was looking for an excuse to use it when I saw the colours from this week's Dynamic Duos challenge - a perfect match for a couple of these papers! I combined the colours with the Freshly Made sketch...


Admittedly, I did tinker with the sketch a bit... I flipped it, made it square, turned the sentiment banner into a swirl of pearls and the three embellishments into ribbon...


I used Apothecary Art (still LOVING this set), stamping it once on Naturals Ivory then again on Very Vanilla. I cut the vanilla flowers out, shaped them with my scoring tool and piercing mat then glued them to the label image and painted with Frost White shimmer paint. The leaves were coloured in with a River Rock marker. I trimmed around the label image and layered it on a label cut from Always Artichoke card.

Here's the recipe:
Stamps: Apothecary Art, Happiest Birthday Wishes
Ink: Always Artichoke, River Rock marker
Paper: Paisley Prints dsp, Always Artichoke, Naturals Ivory, Very Vanilla
Tools: scallop trim border punch, framelits dies
Accessories: pearls, Very Vanilla satin ribbon, shimmer paint

Thanks for stopping by!

x Amy x

Friday 22 June 2012

Bridal Mashup...

Hi there,

It's party time at the Friday Mashup and this week Amanda is challenging us to make something with a party theme - either an invitation, favour, birthday card, thank you card or decoration...


So here is the "Mashup" Challenge :
1. Make a project using the " Party Time " theme.
2. Or Make a project using the " Box in a Bag " tutorial.
3. Or "Mash it Up" and create a "Box in a Bag with a Party Time theme."
I decided to make a little Bridal Shower ensemble, with an invitation and a little matching favour...


I stamped the dress from Love & Laughter with Blushing Bride ink, cut it out and added some pleated ribbon to the hem. The rest is pretty straightforward - I added some pearls to the dress and Blushing Bride layer for a bit more elegance. The favour box was made using the milk carton die, which I embossed using one of the textured impressions embossing folders. Here's a view of both sides:


Both sides have punched squares (whisper white and basic grey) - one side has a heart stamped with an image from I {heart} Hearts and punched out with the coordinating punch; the other side was stamped with the same dress as the card, with 'Amour' from Artistic Etchings over the top. I punched a couple of holes in the top and threaded some white tafetta ribbon through to make a bow.

Make sure you head over to the Friday Mashup blog and check out the rest of the design team's party creations!

Thanks for stopping by!

x Amy x

Thursday 21 June 2012

Domestic teacups...

Hiya,

I wanted to play along with the Paper Players 100th challenge this week - I chose one of their past sketches...


I recently got the Domestic Goddess papers as part of the current 'buy three get one free' deal SU are running. This was the first chance I've had to play with it and this is what I came up with...


I stamped the frame from Apothecary Art (inked with a marker) then stamped the cups inside (using a sticky note to mask the lower cup). The sentiment from the same set was stamped with Charcoal ink. I finished things off with some Calypso Coral ribbon and brads.

Here's the recipe:
Stamps: Tea Shoppe, Apothecary Art
Ink: Charcoal, Calypso Coral, Pool Party
Paper: Domestic Goddess dsp, Basic Grey, Whisper White
Tools: Framelits die
Accessories: Calypso Coral brads, Calypso Coral ruffled ribbon

Thanks for stopping by!

x Amy x

Wednesday 20 June 2012

Mambo Butterfly...

Hiya,

Just popping in with a card I made last night using the Card Patterns sketch and Dynamic Duos colour combo...


I thought a big bold butterfly would work with this colour combo...


I used a couple of scraps of retired stuff for the butterfly: dotted window plastic and embossed black dsp. I added an antique brad for the body and some rhinstones for the antennae. The white background was embossed using my Simply Scored board.

Thanks for stopping by!

x Amy x

Sunday 17 June 2012

I spy an Engagement...

Hello!

I recently got my hands on the wedding-themed set Love & Laughter from the Summer mini catty and wanted to get it inky so I combined the Play Date Cafe colours (which I LOVE!!) and the iSpy sketch this week...


And here's what I came up with:


I stamped the cake with Baja Breeze then added some shading around the edges with an aqua brush and ink. The sentiments stamped underneath are from the same set - one stamped in Rich Razzleberry and the other in Charcoal ink (from the Distressing kit). I added some Dazzling Diamonds glitter with a 2-way glue pen, drawing a stripe across the middle of each section of the cake (not sure you can see it that well in the photo). I also added some rhinestones for a bit of extra bling.

Here's the recipe:
Stamps: Love & Laughter
Ink: Baja Breeze, Rich Razzleberry, Charcoal
Paper: Twitterpated dsp, Basic Grey, Rich Razzleberry, Baja Breeze, Whisper White
Tools: corner rounder punch, scallop trim border punch
Accessories: Rich Razzleberry satin ribbon (retired), rhinestones, dazzling diamonds glitter

Thanks for stopping by!

x Amy x

Saturday 16 June 2012

Apothecary Blues...

Hi there,

I spent some time last night doing lots of colouring and cutting for this week's Colour Q and Freshly Made Sketches challenges.


I turned the sketch on its side so I could use this gorgeous image from Apothecary Art...


I don't know if you can tell from the photo but I stamped the image three times: one I trimmed around the frame, another I coloured with an aqua brush and ink pads and cut out the wreath, and on the other I stamped the sentiment and cut out the banner. The banner and wreath were layered on the label with dimensionals for a paper-tole effect (time consuming but the results are worth it!). I added some Night of Navy buttons with pearls in the centre to finish things off.

Here's the recipe:
Stamps: Apothecary Art
Ink: Stazon, Night of Navy, Bashful Blue, Marina Mist, Lucky Limeade
Paper: Confetti white, Night of Navy, Marina Mist, Beau Chateau dsp
Tools: Scallop trim border punch, Labels Framelits dies
Accessories: Night of Navy buttons, pearls

Thanks for stopping by!

x Amy x

Friday 15 June 2012

Mashed up cupcake...

Hiya,

Today is Friday so it's time for the Friday Mashup challenge! Check out this week's fun:


So here is the "Mashup" Challenge :
1. Make a project using the " Paper Piecing " technique.
2. Or Make a project using " Rich Razzleberry, Daffodil Delight & Pool Party ".
3. Or "Mash it Up" and create a " Paper Piecing Project using the above colors."

I looked through my line-art stamps and keeping the colours in mind thought that Crazy for Cupcakes would work well so I got to work stamping, cutting and piecing!


I used three different papers to make the cupcake: Attic Boutique, Rich Razzleberry patterns and the Time for Tea Simply Scrappin kit. I coloured the flame and sprinkles in with markers. The dsp in the background layers is from Attic Boutique as well (such gorgeous papers in this pack!). I added some Rich Razzleberry buttons and some Daffodil Delight striped ribbon... then couldn't resist adding some bling as well!

Here's the recipe:
Stamps: Crazy for Cupcakes, Party this Way
Ink: Chocolate Chip, Rich Razzleberry, markers
Paper: Attic Boutique dsp, Rich Razzleberry dsp, Time for Tea Simply Scrappin kit, Pool Party, Rich Razzleberry, Whisper White
Accessories: Word window punch, daffodil delight striped ribbon, rhinestones, rich razzleberry buttons

Make sure you head over to the Friday Mashup blog to check out the other fabulous ideas with these colours and technique... Thanks for stopping by!

x Amy x

Thursday 14 June 2012

Retro Mambo Flower...

Hiya,

Just a quick post to show you something I made with the Retro sketch and Paper Players colour challenge...


I pulled out an older set that is great for colouring for this one...


Here's the recipe:
Stamps: Happiness Shared, Tagtastic, En Francais, Vintage Vogue
Ink: Stazon, Basic Grey, Whisper White, Melon Mambo
Paper: Confetti White, Basic Grey, Melon Mambo, Twitterpated dsp
Accessories: rhinestones, basic grey ribbon, top note die, modern label punch

Thanks for stopping by!

x Amy x

Wednesday 13 June 2012

Regal Tea Party...

Hiya!

I combined the Dynamic Duos colour challenge with the sketch from Stamping 411...


When I saw the three circles on the sketch I thought of the tea cups from Tea Shoppe so that's where I started...


I did some selective inking and stamping with my Stamp-a-ma-jig to do the sentiment above and below the middle cup. The decorative edge on the Regal Rose dsp was created using the Edgelits dies in te Summer mini catty. I added some Basic Grey satin ribbon and brads to finish.

Here's the recipe:
Stamps: Tea Shoppe
Ink: Regal Rose, Basic Grey marker
Paper: Twitterpated dsp, Regal Rose dsp, Basic Grey, Whisper White
Tools: Adorning accents edgelits die, stamp-a-ma-jig
Accessories: Basic Grey satin ribbon, basic grey brads

Thanks for stopping by!

x Amy x

Saturday 9 June 2012

Fresh Colour Bloom...

Hello!

Just popping in quickly to share a card I made yesterday, combining the Freshly Made sketch with the Colour Q challenge...


And here's what I came up with:


I created the flower using a combination of the Fun Flowers die and the Blossom punch with Island Indigo card and Tempting Turqouise card and dsp, spritzing with water and scrunching then adding a Real Red button in the middle with a bit of Baker's Twine. I added some die-cut leaves in Lucky Limeade card.

Here's the recipe:
Stamps: Apothecary Art
Ink: Island Indigo
Paper: Twitterpated dsp, Tempting Turquoise dsp, Real Red, Island Indigo, Tempting Turqouise, Lucky Limeade, Whisper White
Tools: Modern Lable punch, Word Window punch, Blossom punch, scallop trim border punch, Fun Flowers die, Little Leaves sizzlit die
Accessories: Real Red button, Island Indigo Baker's Twine

Thanks for stopping by!

x Amy x

Friday 8 June 2012

For the Birds...

Hi there,

It's time for the Friday Mashup challenge and this week Lisa has challenged us to get sketchy with birds!


So here is the "Mashup" Challenge :
1. Make a project using " the Sketch ".
2. Or Make a project featuring " Birds ".
3. Or "Mash it Up" and create a " project using the Sketch featuring Birds ".

I dug out a couple of sets I haven't used in a while to create my card...


I started with the frame from Notably Ornate stamped in Sahara Sand and trimmed with my paper snips. This stamp set was one that I absolutely loved when it first came out but I haven't used it anywhere near as much as I thought I would! It goes really well with Nature's Walk in that they have the same vintage-feel detailed stamps. I stamped the birdcage from Nature's Walk in Sahara Sand and the bird in black, cut both out and layered on the frame. I used black 1/8" taffeta ribbon to create a bow, secured with an antique brad at the top of the frame - I layered some black striped grosgrain underneath. The Daffodil Delight layer was inked with Tea Stain ink (from the Distressing kit) around the edges to soften it a bit and I added some pearls as a finishing touch. The greeting was stamped on a die-cut heart (from the Sizzlits alphabet set) with a sentiment from Pennant Parade.

I used the colours from the Hand Stamped Sentiments challenge - my favourite combo at the moment. This summer I want to redecorate our bedroom with these colours lol!

Here's the recipe:
Stamps: Nature's Walk, Notably Ornate, Pennant Parade
Ink: Sahara Sand, Basic Black, Tea Stain
Paper: First Edition dsp, Basic Grey, Sahara Sand, Very Vanilla
Tools: edgelits scallop die & embossing folder, sizzlits alphabet die set
Accessories: black striped grosgrain ribbon, 1/8" taffeta ribbon, antique brad, pearls

Make sure you head over to the Friday Mashup blog - there's an opportunity for YOU to choose our challenge at the end of this month! Check out this post for more details...

Thanks for stopping by!

x Amy

Tuesday 5 June 2012

Jubilee Cupcakes...

Hiya,

Today is the Diamond Jubilee holiday here in the UK and there are many celebrations going on, with street parties, concerts and parades going on (in the rain!!). I thought I'd get into the spirit of the day and make a little Jubilee creation... inspired by the Dynamic Duos colour challenge together with the Card Patterns sketch.


When I first saw these colours it didn't even enter my head to do anything 'patriotic' - I was thinking maybe butterflies... or flowers... but then I had a brain wave yesterday and thought 'hey they're the colours on the UK flag'... duh!! Obviously all the bunting all over the place has made an impression! So in order to celebrate I decided to make some very British cupcakes...


I stamped the cupcakes onto watercolour paper and coloured with markers (I hand-drew the flags on three of the cupcakes... so much fun!) then added Frost White shimmer paint to the icing and the stand. The image was cut out with the new framelits dies - I added a layer of Island Indigo behind to make it stand out a little more. The Real Red background was stamped with the Medallion background stamp and embossed with white EP (I wanted to make it look like a doily, to fit with the cupcake celebration theme). I drew some faux stitching with a white Signo gel pen around the edge of the Real Red piece and added some Island Indigo brads (to represent the three buttons on the sketch). Some white organza ribbon finished things off together with a little tag with a crown motif (rather appropriate for today!) tied with Indigo Island baker's twine.

Here's the recipe:
Stamps: Crazy for Cupcakes, Tiny Tags
Ink: Stazon, Island Indigo, Versamark, SU markers
Paper: Watercolour, Real Red, Island Indigo, Whisper White
Tools: Framelits dies, jewellery tag punch, whit signo gel pen
Accessories: White organza ribbon, island indigo baker's twine, island indigo brads, white EP

Thanks for stopping by!

x Amy x

Monday 4 June 2012

Summer grass & flowers...

Hi there,

We have a Bank Holiday in the UK today (and tomorrow for the Diamond Jubilee!) so I have extra time to get creative {grin!}. I combined the colours from the Create with Connie & Mary challenge with this week's Unscripted sketch and added the 'Summer' theme from The Paper Players challenge...


When I think of Summer I think about the small of freshly-cut grass and flowers on a warm day - I wanted to capture that idea so I pulled out the Just Believe stamp set and worked with that.


I needed a 'Get well' card so used the sentiment from Hopeful Thoughts, punched out with the modern label punch and layered on a sizzlit die-cut. The papers are from the Berry Blossoms dsp (retired now...).

Here's the recipe:
Stamps: Just Believe, Hopeful Thoughts
Ink: Chocolate Chip, SU markers
Paper: Berry Blossoms dsp, Chocolate Chip, Whisper White, Lucky Limeade
Tools: modern label punch, Sizzlits Lots of Tags die, corner rounder punch, scallop trim border punch
Accessories: Chocolate Chip satin ribbon

Thanks for stopping by!

x Amy x

Saturday 2 June 2012

I spy a tea cup...

Hi there,

I played along with this week's Colour Q and iSpy Sketches challenges today...


I had lots of fun with buttons for this one!!


I found some retired Bashful Blue dsp in my stash and used that for the background. The teacup was stamped with Rich Razzleberry and trimmed - I tied some lace trim to the handle for a bit of a girly touch.

Here's the recipe:
Stamps: Tea Shoppe
Ink: Rich Razzleberry, Night of Navy
Paper: retired dsp, Night of Navy, Crumb Cake, Very Vanilla
Accessories: lace trim, buttons, antique brad, rhinestone brad, linen thread
Tools: Modern label punch

Thanks for stopping by!

x Amy x

Friday 1 June 2012

Scrappy Mashup...

Hiya,

This is my first post as a member of the Friday Mashup DT - yay! This week, it's all about using your scraps...

So here is the "Mashup" Challenge :
  1. Make a project using " Scraps of Pattern Paper or Ribbons ".
  2. Or Make a " Scrapling ".
  3. Or "Mash it Up" and create a " Scrapling using Scraps or Pattern Paper or Ribbons. ".
I rummaged through my draw od dsp and found some scraps of Flirtatious designer paper... this is what I found:


I decided to make my favourite 'scrappy' project - a tall, thin notebook - with a coordinating card.


The notebook is really easy to make with scraps because you only need two and a half inches of width from your dsp. My notebook used up some thin strips that were left over from making other projects which otherwise would have been thrown out.


I also used images from my scrap pile for the notebook as well - the flower and butterfly were there left over from previous projects. Even the 'take note' part was cut from scrap card!


Here's the card I made to go with the notebook... I used a square punch to create the background from the scraps I had left then simply added some more butterflies from my stash, a sentiment banner (also left-over!) and a couple of embellishments to finish.

Thanks for stopping by... I hope you get the chance to make something with your scraps!

x Amy x